Build a buffalo fly tunnel trap
Buffalo fly tunnel traps are a chemical-free way to remove adult flies from cattle. They may reduce fly populations by 60–80%.
When you combine chemical treatments with non-chemical methods (such as buffalo fly traps), you improve long-term fly control and slow the development of insecticide resistance.
How the trap works
A buffalo fly tunnel trap is a short, dark tunnel that cattle regularly pass through.
As cattle enter the tunnel, the sudden change in light triggers flies to leave the animal. Fly cages mounted on the sides of the tunnel capture the flies.
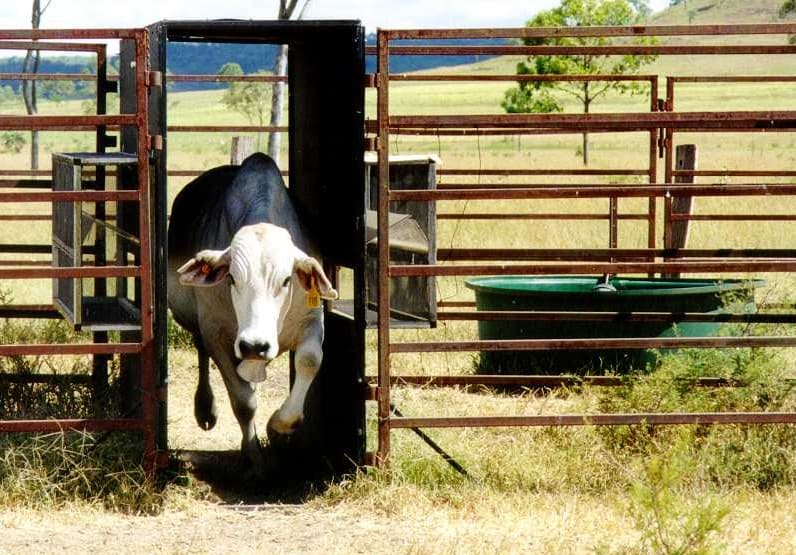
Cow using a buffalo fly tunnel trap.
© Queensland GovernmentBefore you start
Plan for daily cattle use
The trap only works if cattle use it regularly (at least once a day).
Install the trap where cattle already move as part of their routine:
- For beef cattle—a controlled watering point or feed station.
- For dairy cattle—a laneway or yard leading to the milking shed.
If you cannot control water access, use feed supplements to attract cattle and manage access to the feeding station.
You can also adapt the tunnel trap for self-mustering.
Choose the right site
Pick a well-drained site so cattle do not churn the ground around the trap.
- Decide if your trap will be temporary or permanent.
- For permanent installations, consider a concrete pad to prevent deep ruts and reduce maintenance.
Train cattle to use the trap
Some cattle need time to accept the structure. If cattle hesitate, assemble the trap in stages (tunnel first, then cladding, then cages).
Specifications
Tunnel (internal)
- 2400mm long
- 1800mm high
- 800mm wide
Side windows (each side)
- 1900mm long
- 200mm high
- Position the bottom edge 700–900mm above ground
- Seal cages over the windows so flies cannot escape around the edges
Cages (external, each side)
- 2000mm long
- 650mm high
- 300mm wide
- Cover cages with a wire fly screen on all sides except the side facing the tunnel
- Fit a funnel-shaped baffle inside each cage
Use the plans to confirm exact sizes, cut-outs and baffle placement:
- Tunnel dimensions—confirms tunnel sizes and window cut-outs.
- General assembly plan—shows the full layout and how parts connect.
- Cage frame plan—shows cage construction and fixing points.
- Cage and baffle plan—shows baffle shape, gap and placement.
Materials needed
Tunnel
- 25mm rectangular hollow section (RHS) for the steel frame
- 12mm plywood for tunnel sides
- 7mm plywood for tunnel roof
- 20mm RHS or 15mm pipe pegs (roof pegs)
- Matte black paint (for plywood and frame), if painting
Alternative cladding options:
- 2mm black sheet polythene or
- tin sheeting for sides and roof.
Cages
- 25mm aluminium or steel RHS for cage frames
- Wire fly screen (to cover cages)
- Bolts or screws (to attach cages through the horizontal RHS frame bars)
- Door sealing strips or silicon sealant (to eliminate gaps)
Baffles
- Flat steel and fly screen, or fly screen framing (as shown in the plans)
- Hinges (to join baffle sides)
- Brackets (if needed) to hold the baffle in position
Instructions
Step 1: Build the tunnel frame
- Mark out the internal dimensions: 2400mm long, 1800mm high, 800mm wide.
- Cut 25mm RHS to length.
- Weld or bolt the frame together.
- Square the corners and check stability.
Compare your frame to the tunnel dimensions and adjust before you add cladding.
Step 2: Set the tunnel on a level base
For a temporary installation:
- Position the frame on a level base and brace it to keep it square.
For a permanent installation:
- Excavate the site to suit the concrete pad depth.
- Set formwork to the tunnel footprint.
- Pour concrete and allow it to cure fully.
- Anchor the frame to the pad.
Step 3: Fit the roof
- Insert 20mm RHS or 15mm pipe pegs into the tops of the side frames.
- Fit the roof so it sits flat and covers the full tunnel.
- Fix the roof in place.
Keep the roof tight. Light leaks reduce performance.
Step 4: Sheet the tunnel
- Fix 12mm plywood panels to the tunnel sides.
- Fix 7mm plywood to the tunnel roof.
- Reduce internal light by doing one of the following:
- Paint the plywood and frame matte black.
- Cover the sides with a 2mm black sheet of polythene.
- Use tin sheeting for the sides and roof.
Step 5: Cut the side windows
- Mark a rectangle 1900mm long by 200mm high on each side panel.
- Cut out the window openings.
- Set the bottom edge 700–900mm above ground.
- Check that both windows match in size and height.
Step 6: Build the cages
For each side window:
- Build a cage frame 2000mm x 650mm x 300mm from 25mm RHS.
- Cover cage sides with wire fly screen, leaving the tunnel-facing side open.
- Seal all joints so there are no gaps.
Use the cage frame plan to confirm construction details.
Step 7: Attach and seal the cages
- Position each cage over a tunnel window so it fully covers the opening.
- Fix the cage to the horizontal RHS frame bars using bolts or screws.
- Inspect the join between the tunnel and the cage.
- Seal all gaps with door sealing strips or silicon sealant to create a fly-proof connection.
Step 8: Build and fit the baffles
- Build a funnel-shaped baffle from flat steel and fly screen (or framing as shown in the plans).
- Hinge both sides to fold the baffle during installation.
- Rest the baffle on the cage centre bars and leave a 20–40mm gap at the top.
- Seal the baffle against the cage sides to prevent flies from escaping.
- Raise the flat steel that attaches the screen by 5mm above the cage centre bar to form a protective lip.
- Add a bracket if needed to hold the baffle in place.
Use the cage and baffle plan to confirm shape, gap and placement.
Step 9: Final checks
- Check the roof and confirm there are no light leaks.
- Check that each cage fully covers its window.
- Check all joins are sealed and fly-proof.
- Check baffles sit correctly and seal against cage sides.
Compare your finished trap to the general assembly plan and adjust if needed.
Step 10: Set up and train cattle
- Set the trap so cattle pass through it at least once a day.
- Control access to water where possible.
- Use feed as an attractant if you cannot control access to water.
- If cattle hesitate, return to the staged assembly and add cladding and cages once cattle move through confidently.
Check and maintain the trap
- Check seals, screens, and baffles regularly, and fix gaps immediately.
- Keep the tunnel dark by fixing light leaks and replacing damaged cladding.
- Keep the approach and exit areas well drained so cattle continue to use the trap.